Welcome to my blog! To start off, I'm Krista. I am a Stay At Home Mom of three boys, wife to Chris who's in the Air Force and we are stationed in Southern New Mexico. Anyway snoop around and come back often!
Okay let's get to business...
Here's what I posted in the group as starter stuff... I also added a few things so read careful!
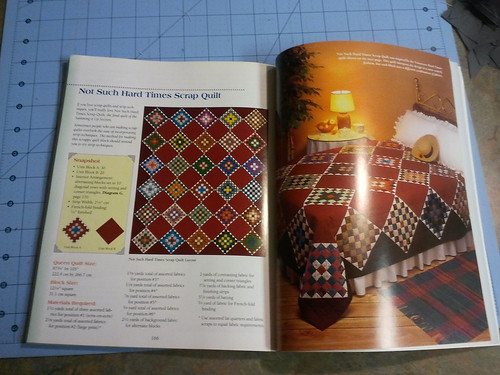
Jolene has given us permission to use her as a reference. I will post the quilt along on my blog and put links in this group.
Here's the size options and requirements...
Original refers to Jolene's quilt on her blog.
Baby 40x51
Original 51x61
Lap 61x72
almost Full 72x82
Queen 82x93
Need:
baby quilt 40x51
1 7/8yards background fabric
156 2.5" squares (96 outer, 60 inner) ((this could be one charm pack))
Original quilt
2yards of background fabric per her blog
260 2.5" squares (160 outer, 100 inner) ((2 charm packs))
Lap quilt
3.25 yards background
390 2.5" squares ( 240 outer, 150 inner)
Almost Full
4.25 yards background
546 2.5" squares (336 outer, 210 inner) ((one jelly roll or layer cake))
Queen
5.5 yards background
728 2.5" squares (448 outer, 280 inner) ((one jelly roll or layer cake PLUS one charm))
The background fabric is for the blocks, sashing and a 5.5 inch unfinished border.
Inner refers to the middle five in the block.
Outer is the outer 8
And the rest are background squares.
Sashing is cut at 2.5"
Borders are cut at 5.5
Baby quilt are 3 squares across, 4 long
Original is 4x5
lap 5x6
Almost Full 6x7
Queen 7x8
Okay let's do this..
You are going to need quite a few 2.5" squares. The amounts above are the minimum, I would suggest AT LEAST 20 more. The reason is, if you are doing color planned squares, you are going to want to have some choices more if a square just doesn't go with the others.
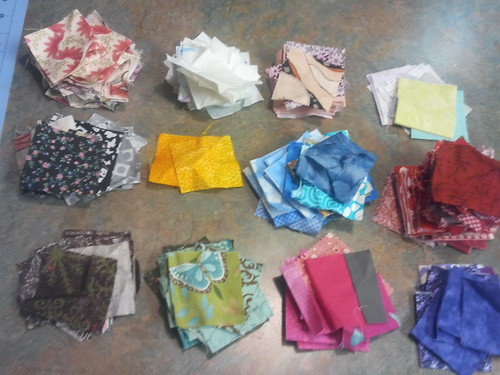
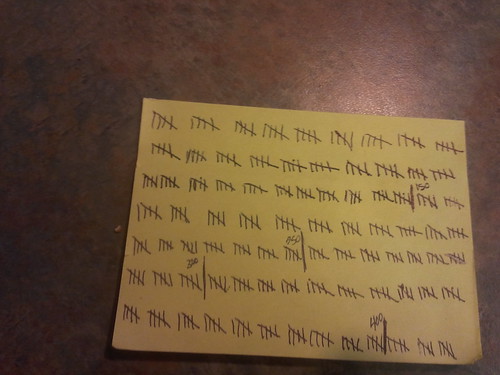
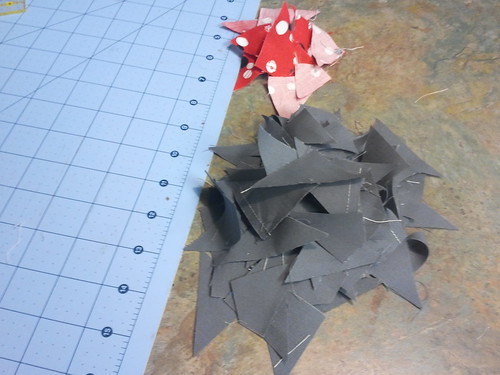
Here's how I kept track of how many scraps I have cut. I definitely cut more than needed but it's an easy way to be able to walk away from cut squares without having to count all over again. My house is a place where I get to sew 5 minutes here, 3 minutes here.
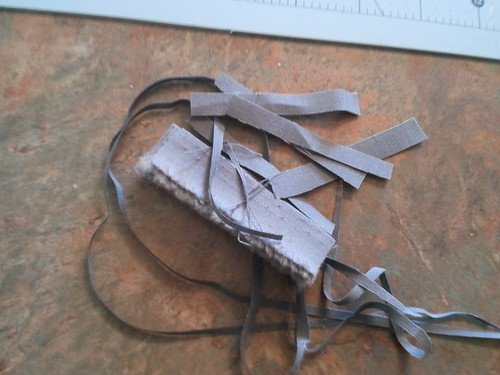
Scraps have a new plan in my house these days. Scraps are going to be bedding for my kitty bed!! I got the idea from someone on Flickr but now I can't find her to give her credit! (I'm sorry chica!)
Background squares. You need to cut 2.5 wide strips.
I suggest you cut your fabric with 12 layers, (6 strips folded in half). That way, when you cut the 2.5" square, you have all 12 squares of your background fabric, in a pile for each Granny block.
If you do it this way, you need..
Baby quilt needs 12 total strips
Original needs 18
Lap needs 24
Al Full needs 30
Queen needs 42
Each 42" strip makes 17 squares (2.5" squares)
If you are not going to use 6 layers, you save some fabric...
Baby needs 9 strips
Original needs 15 strips
Lap needs 21 strips
Almost Full 30 strips
Queen needs 40.5 strips
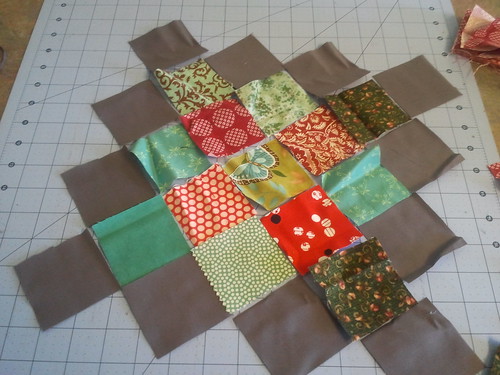
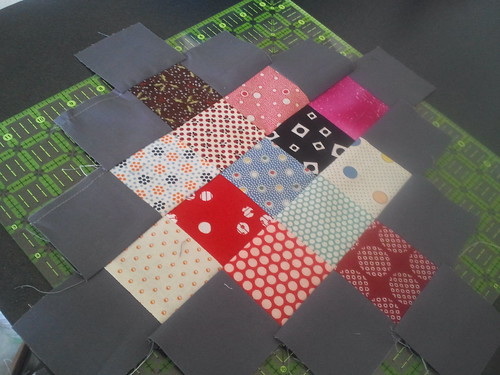
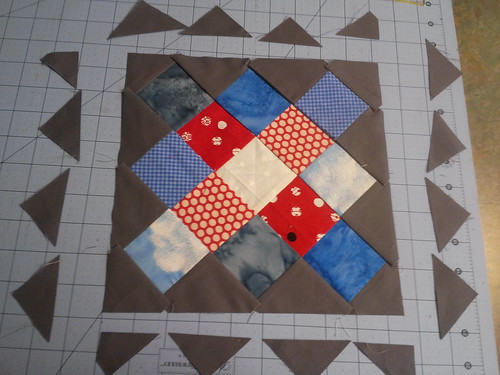
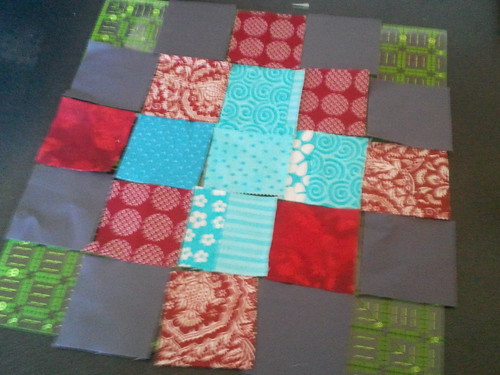
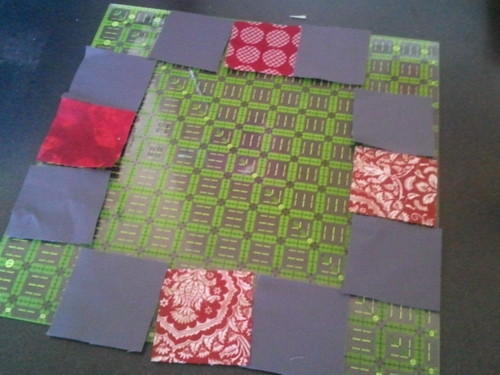
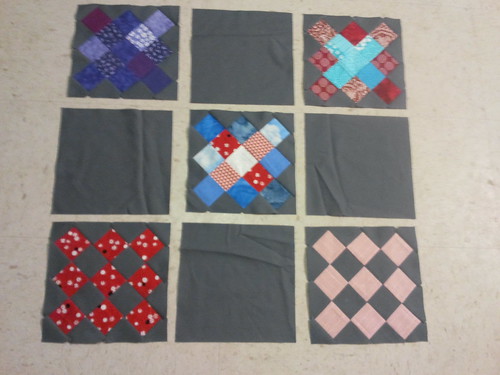
Lay out your squares how you want them. 12 squares are needed for the outer edge of background fabric (Kona Coal in picture below). 8 for the middle ring (greens). And 5 for the center (red but center is green).
Here are some more ideas for layouts...
Themed- this one is dots
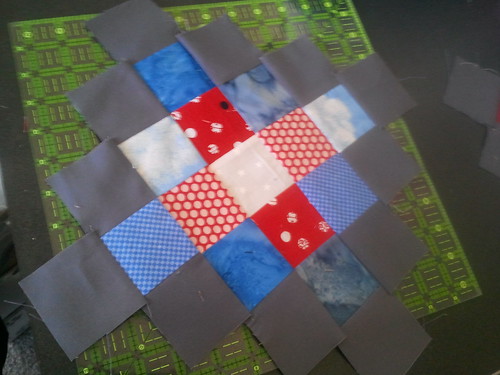
Red, White and Blue -this one might be fun with a white background instead of the coal
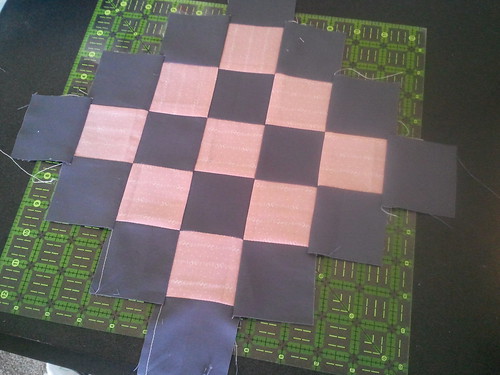
One color
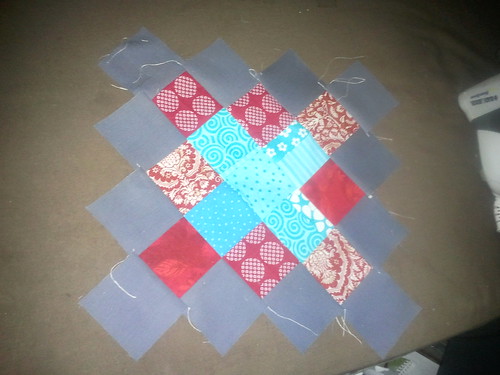
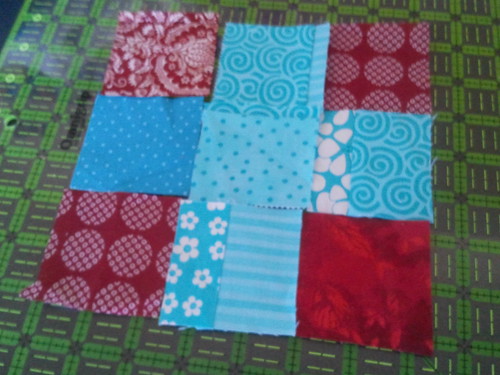
The popular aqua and red combo
Tracy is uber smart and figured out a way to make this block without the bias sides!!
Here's her tutorial... HERE
Such a great idea! I'm sooo glad she figured out the Math for that! I can do squares... triangles, not so much! Her tutorial would definitely cut down on these...
Okay jump backwards..
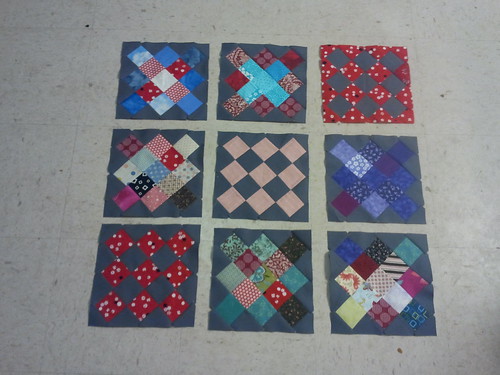
Once you figure out your block layout, start piecing the squares together. I did my first block piece by piece, then I hung it up on my wall in front of my machine so I could match it and chain pieced the rest of the blocks. Then laid them out and pieced again.

See that overlap right there? Yeah where the grey and grey are touching... it's suppose to be there. It's a good thing, as Martha Stewart says.

Now we are fast forwarding to trimming. Jolene already showed you how to piece so you kids have that already!
If you are making a bunch of these squares, I HIGHLY recommend you getting your hands on a 9.5" square ruler. They will make your life happy...trust me! (Save your JoAnn's coupon and get it for 40% off cause they are hardly ever on sale)
Okay so instructions on how to trim...
Find the middle of your squares. I find it by folding in half one way, pressing in a crease. Fold it the other way, press a crease. Open it up and you have a little X in the middle. (This doesn't have to be exact at all. Just a general reference point.)

If you have a 9.5" ruler, mark the center (4 3/4"). I use a Sharpie. (With a bit of spit and a finger nail, it comes off again.) Like I said before, in my house things get touched and moved, so I have to be able to leave it on the counter, change a diaper, fill a sippy cup and come back. A sharpie stays put long enough for me to cut out a quilt. the dry eraser ones, do just that... erase!

So line up your X with your dot on your ruler, and take a glance.

Most of my blocks were pretty straight on. Some I had to fudge a little bit clockwise or counterclockwise. Keep in mind that you want the center to stay the same but you can move the corners of the ruler. Your goal here is to cut a square with the minimum amount of "valleys." (see below)

I don't know what else to call it but a valley so therefore, it shall be named Valley!
Jolene cut her blocks to about 9 1/4". She wouldn't have to worry too much about Valleys.
I didn't want to waste a perfectly good 9 1/2" ruler. :) So I cut mine at 9 1/2".
Because I know that I sew with a generous 1/4" seam allowance, I can get away with this. If you are a perfect 1/4" seam allowance person, you probably want to cut at 9 1/4. (just remember your dot on your ruler needs to move in an 1/8")
So find on your ruler where you cut with with the smallest valleys on all four sizes.
Now you have square blocks!! YAY!!!!
See that red block on the top right corner, I thought I would show you that if you did every other block like that, you would give the illusion of a bigger block every other one, if you used the same color sashing as the middle of the blocks.
Let's talk about sashing now..
The background fabric yardage above includes your sashing too. The sashing is going to be 2.5" wide.
Now I'm stepping up on a soapbox because this is a wonderful program. If you have a phone that has apps or an apple product, I would totally get this.

It's Robert Kaufman's Quilt Calc. It's free and SOOOOO helpful.
Here's a couple screen shots...

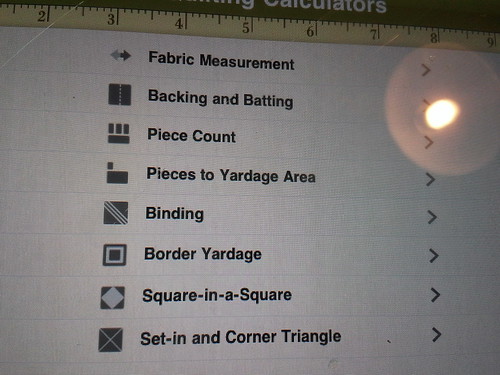
Awesomeness huh?!
Anyway it will totally make your life easier, especially the binding one. It tells you how many strips to cut!!
Well I'm sharing... Here's another idea that I found in one of my quilting books

GRANNY SQUARES!!!!!
They teach you how to strip piece the squares!

This was something I thought about while making these blocks. If you weren't doing totally scrappy, you could definitely make this go faster.
Here's what I'm talking about...
Layout for the aqua and red block
See these pieces could all be cut from strips. One background (2.5" wide), one red (2.5) and background (2.5)
And then have a Nine Patch center
Then add in the four extra squares on the outside.
So from the book, I got the idea to put a blank square in between each Granny Square.
So because I added the "spacer" blocks, I felt like it didn't need sashing too.
If you were doing sashing, this is where you would add it!! :)

Then you would add your border!
Your border is cut at 5.5" to make a 5 inch border.
Here is the Math for the amount of strips... (this is already calculated into your yardage above)
baby quilt cut 4 5.5" strips (need 5/8 yard)
Original cut 5 strips (need 5/6 yard)
Lap cut 6 strips (need 1 yard)
Almost Full cut 7 strips (need 1.125 yards)
Queen cut 8 strips (need 1.25 yards)
(The handy-dandy Robert Kaufman app figured this out for me!!)
I didn't figure in binding or backing for these quilts because I think most of you will be doing scrappy, or using up the scraps from the granny squares.
If you would like me to figure that out for you, I would LOVE it! (I'm a Math geek at heart)
So I think you've figured out that this is pretty much the WHOLE quilt along. We decided since Jolene (Blue Elephant Stitches) had pretty much lead the way, that I would just show you a few tricks and such.
BUT...
We have a couple giveaways!!
Here's how to enter, come back to my blog next week (I'll have a link up in the flickr group) and leave a comment on how far you have gotten. It doesn't matter if you have gotten as far as bookmarking the QAL or have the whole top done, just as long as you come back and enter.
We will have two winners.
Dana, our wonderful leader, has offered up a gift certificate to her place!!
And there's a Jelly Roll up for grabs... you decide what flavor you want!!
So girls (and guys)... get to cutting those scraps! I can't wait to see the different designs you amazing chicks (and dudes) come up with!


